SQL Server 2008 R2 (Pubs, Subs, and Other Replication Appetizers)
Database Backup (Database Maintenance Plans) Database and Log Backups
SQL Server 2008 R2 Installation Installation, Firewall Settings, etc.
- Windows XP Firewall Settings
- Windows 7 Firewall Settings
- Sql Server Connection Configuration
Creating Publications in Sql Server 2008 R2 Using the Wizard
Creating Subscriptions in Sql Server 2008 R2 Using the Wizard
- Windows XP Synchronization
- Windows 7 Synchronization
- Database Permissions / Synchronization Properties
o Windows XP
o Windows 7
Prepared by Kyle Joersz, North Dakota Industrial Commission
For the RBDMS Annual Users and Training Conference April 2011
Much Thanks to the following for input and assistance:
Rick Sims, Mississippi Oil and Gas Board
Chuck Borcher, Nebraska Oil and Gas Conservation Commission
Maintenance Plans – Database / Log Backup
Whenever a database is created, this needs to be done. Don’t forget.
In Sql Server Management Studio-Management
Rt-Click on Maintenance Plans-Maintenance Plan Wizard
FYI, In Sql Server 2008 Express, Maintenance Plans can be created or deleted, but
not edited. This must be done on your server version.
Also I like to separate each database into it’s own plan and also the system
databases (master, distribution, etc.) together in one plan. Additionally, you will
need to make a plan backing up the LOG file. This will be another separate plan,
which you could put all of your non-system databases together or not. DON’T
FORGET TO MAKE A LOG BACKUP PLAN or your log file will GROW and
take up the entire hard disk space, right Chuck and Kyle! Thanks Chuck for the
suggestion to put this in this document.
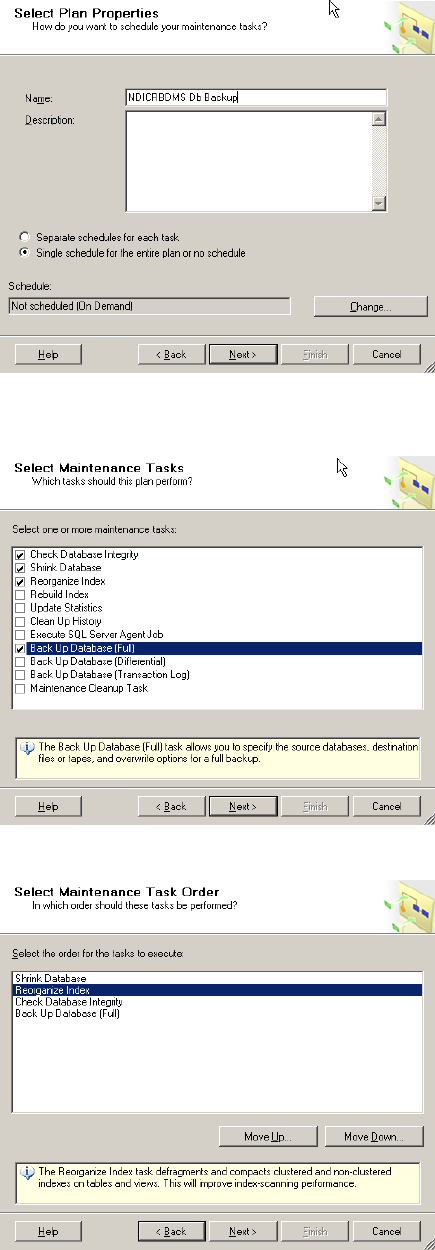
Database Backup Maintenance plan.
Click Next
Name the Plan, Change the Schedule if desired, Click Next
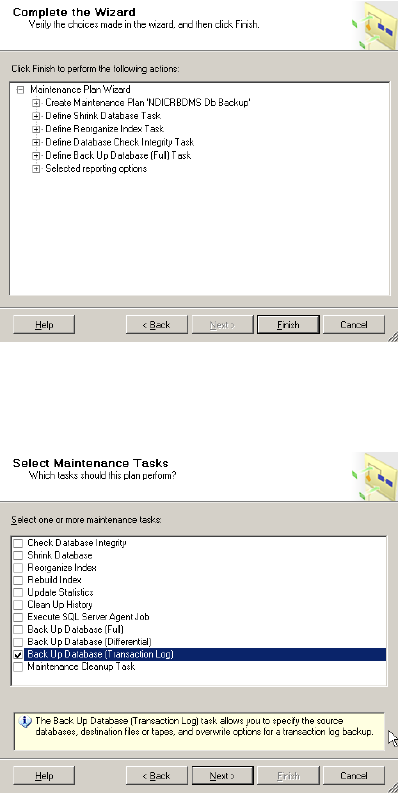
Select the desired tasks and click next.
I found the below tasks as recommended somewhere on the internet, so it must be right!
In the following order (also found recommended)….. (move up or down)
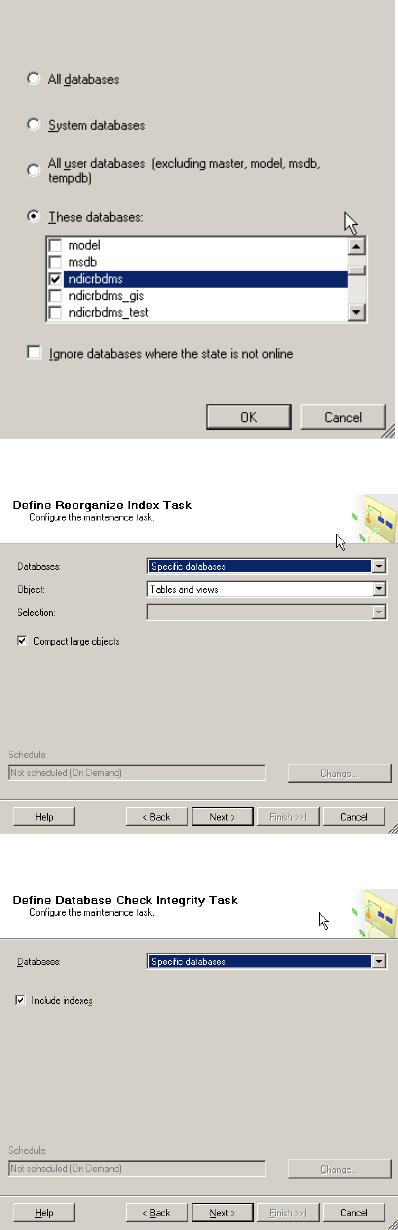
Define Shrink Database – Select your database
Define ReOrganize Index Task – Select your database
Define Database Check Integrity Task – Select your database
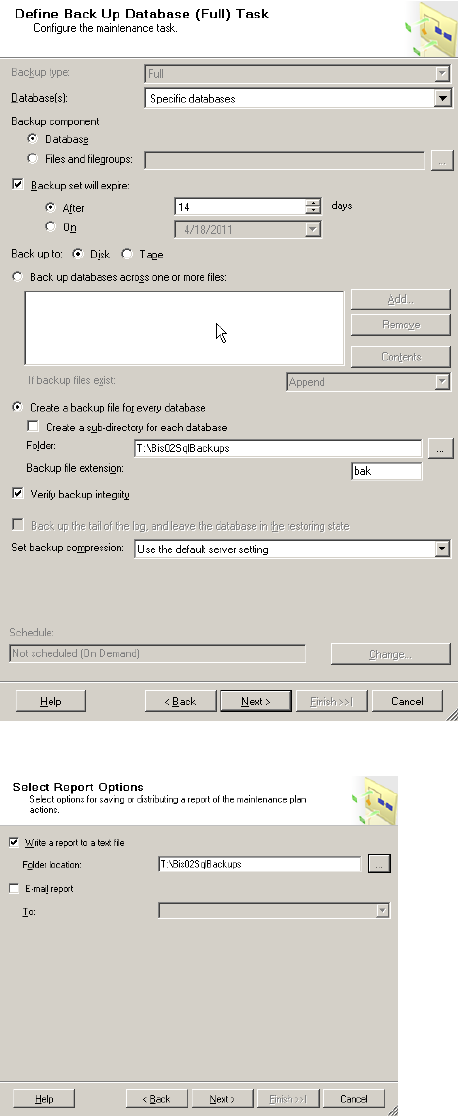
Define Back Up Database Task as desired. I believe in putting the backup files on a
separate drive other than the default C: drive Sql is installed on.
Select Report Options
Click Finish.
Database Log Backup Maintenance plan – Must schedule or your log file will grow and
grow………..
And set up similar to above… schedule as often as desired (daily, hourly, etc).
SQL Server Express 2008 R2 Installation
Must be Logged in as domain Administrator if on a Subscribers computer.
For Windows XP, if Windows Installer 4.5 isn’t installed, install the following:
WindowsXP-KB942288-v3-x86.exe. This updates the XP Windows Installer to 4.5.
Install Sql Server Express 2008 R2:
Windows XP - SQLEXPRADV_x86_ENU.exe
Windows 7 - SQLEXPRADV_x64_ENU.exe
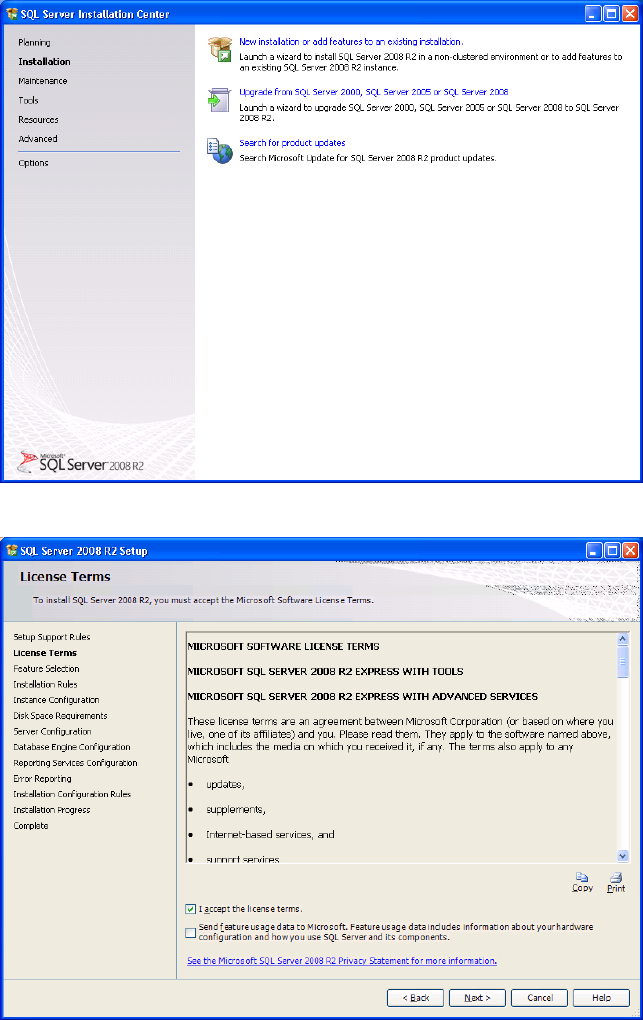
Click on “New installation or add features to an existing installation”
Accept the License terms
Next (Feature Selection)
Next (Installation Rules)
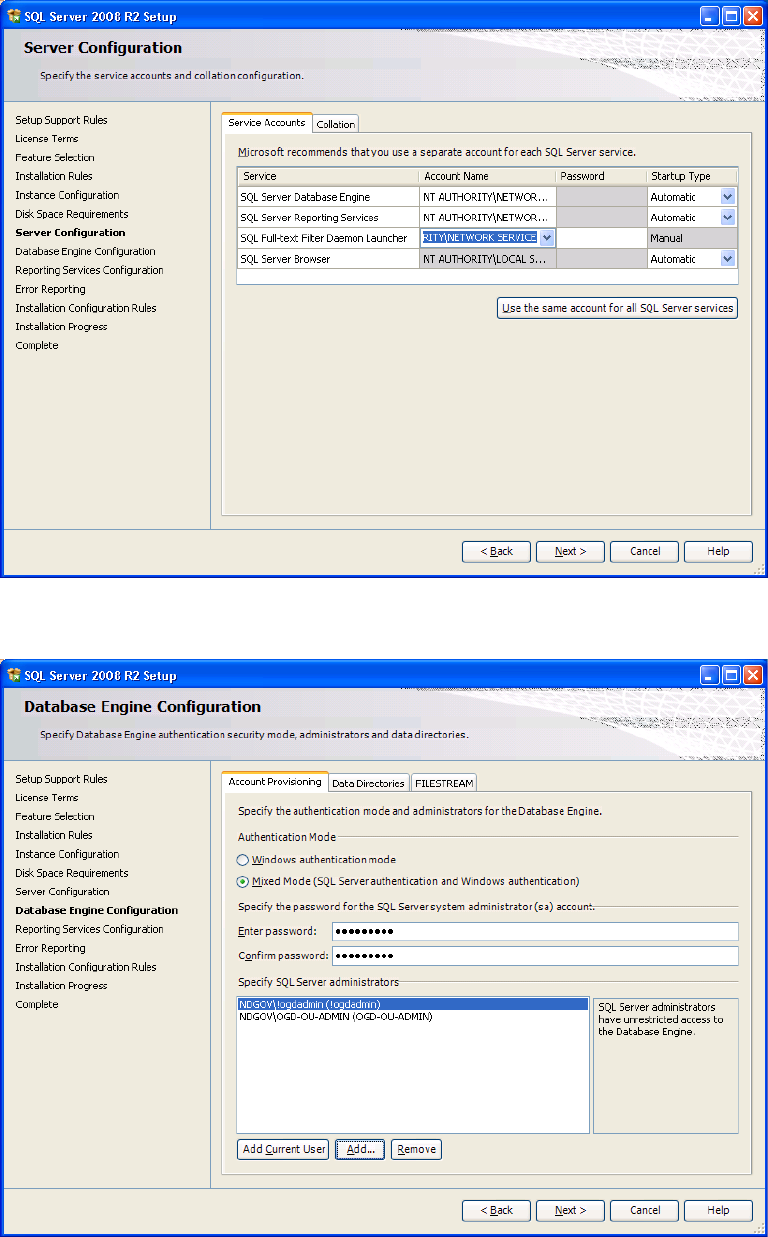
Server Configuration – Set all Account Names to NT Authority/Network Service, no passwords,
Startup Type – all to Automatic except Full-text Daemon Launcher leave Manual
Database Engine Configuration – Mixed Mode (enter SA Password)
Add “ogd-ou-admin” group from ndgov\ to “Specify Sql Server administrators”
Next (Reporting Services Configuration)
Next (Error Reporting)
Notes:
Installation Errors
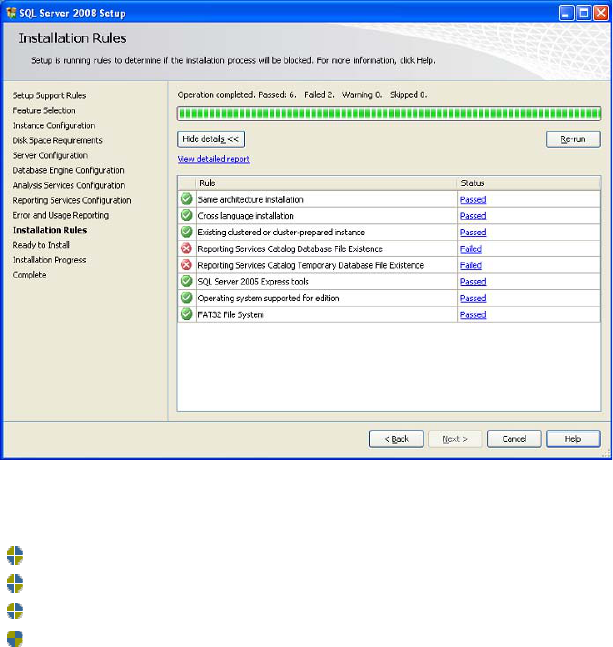
Prior to completing installation, an inventory of projects will show and if any errors are listed,
they should be remedied before continuing. For example, one of the steps listed involves
Windows XP and Powershell 2.0. If this is listed as failed, you must install this, which at the
time of this writing is in an Optional Windows Update. I was able to leave this on the step
showing the failed steps and install this one window update and then go back to this installation
because no restarts were required for the window update installation. Re-runing the installation
steps should then work. We didn’t see this problem in Windows 7, but didn’t run as many
installations on the OS. I didn’t save a screen shot of this error, but it is similar to the one below
with a direct reference to Powershell 2.0.
AGAIN, IF YOU DON’T REMEDY THE FAILED INSTALLATION RULES, MOST LIKELY
THE SQL INSTANCE WILL NOT WORK PROPERLY. TRUST ME.
And if you do proceed to install with the failures, YOU WILL NEED TO TOTALLY Un-Install
the entire program through Add/Remove Programs and start again.
If un-installing the entire Sql Server 2008 Express R2 is involved, YOU MUST also remove a
couple of files manually after the un-install is done or it will error on Reporting Services during
the installation. Leave it to Microsoft! This can done while leaving the installation program
open where it is.
Do the manual cleanup below and then return to it and click Re-Run.
You will then have to remove the following files (they all may not exist) from the "C:\Program
Files\Microsoft SQL Server\MSSQL10.MSSQLSERVER\MSSQL\DATA" directory:
ReportServer.mdf
ReportServer_log.LDF
ReportServerTempDB.mdf
ReportServerTempDB_log.LDF.
Installation progresses to Completion - RESTART
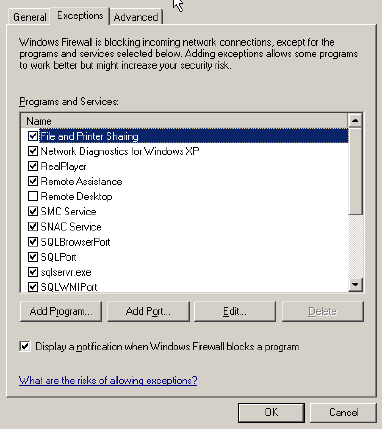
Configure Sql Port Firewall Connections for Windows XP
Install Windows XP Firewall exceptions (through Windows Firewall – Exceptions – Add Port,
add each of the below ports, or to make it easier, we made a batch for this called
SQL2008Express_FireWall.bat:
(netsh firewall set portopening protocol = TCP port = 1433 name = SQLPort mode = ENABLE
scope = ALL profile = CURRENT
netsh firewall set portopening protocol = UDP port = 1434 name = SQLBrowserPort mode =
ENABLE scope = ALL profile = CURRENT
netsh firewall set portopening protocol = TCP port = 135 name = SQLWMIPort mode =
ENABLE scope = ALL profile = CURRENT
pause)
The .bat file runs in Windows 7 and works but throws a couple of errors
Manually:
Notes since I didn’t know what these were:
WMI = Windows Management Instrumentation
UDP = User Datagram Protocol
Manual: Open Windows Firewall – Exceptions
Click Add Port
Name: SqlPort
PortNumber: 1433
Repeat for SqlBrowserPort UDP 1434
Report for SqlWMIPort TCP 135
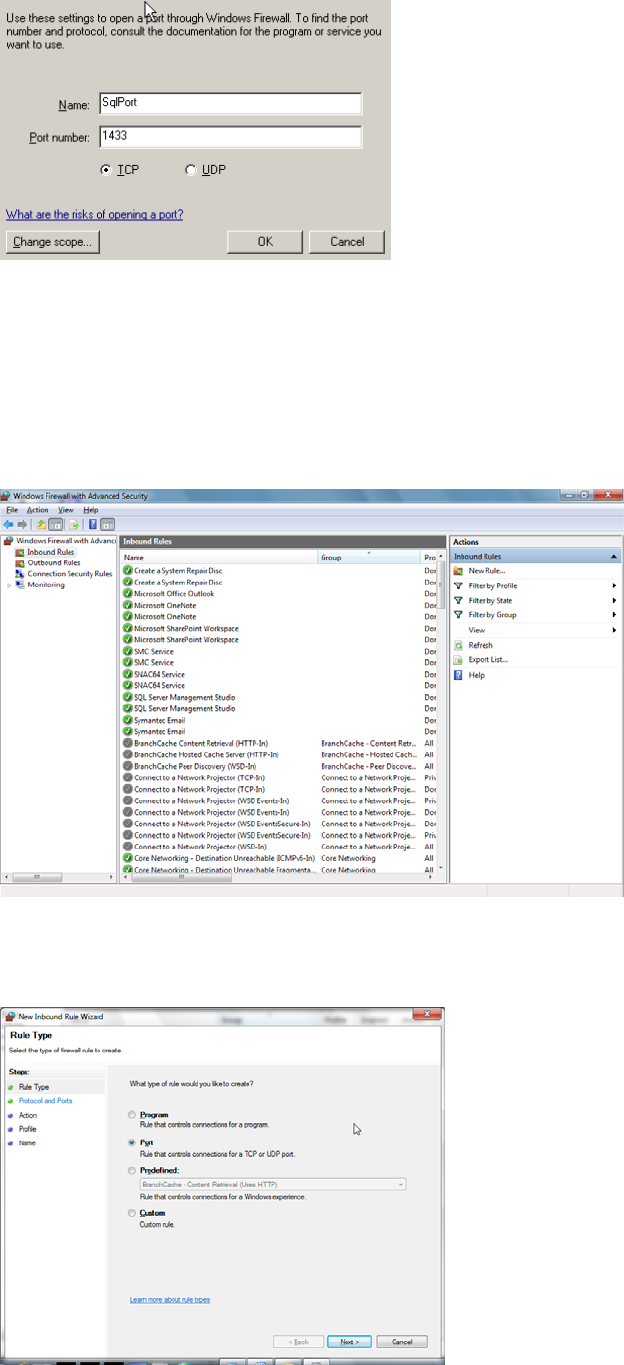
Configure Sql Port Firewall Connections for Windows 7
Open Windows Firewall – Advanced Settings – Click on InBound Rules
Click on New Rule
Click Port
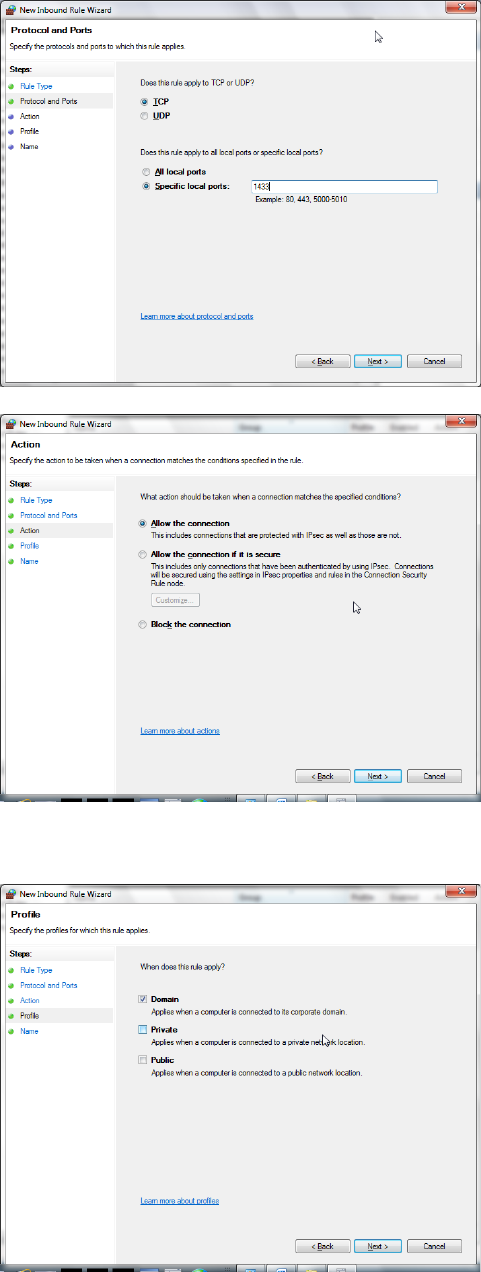
Select TCP and Specific Local Ports = 1433
Click Allow the Connection
Select Domain (unselect Private and Public)
Name the Rule
Repeat for UDP = 1434 as SqlBrowser
Report for TCP = 135 as SqlWMIPort
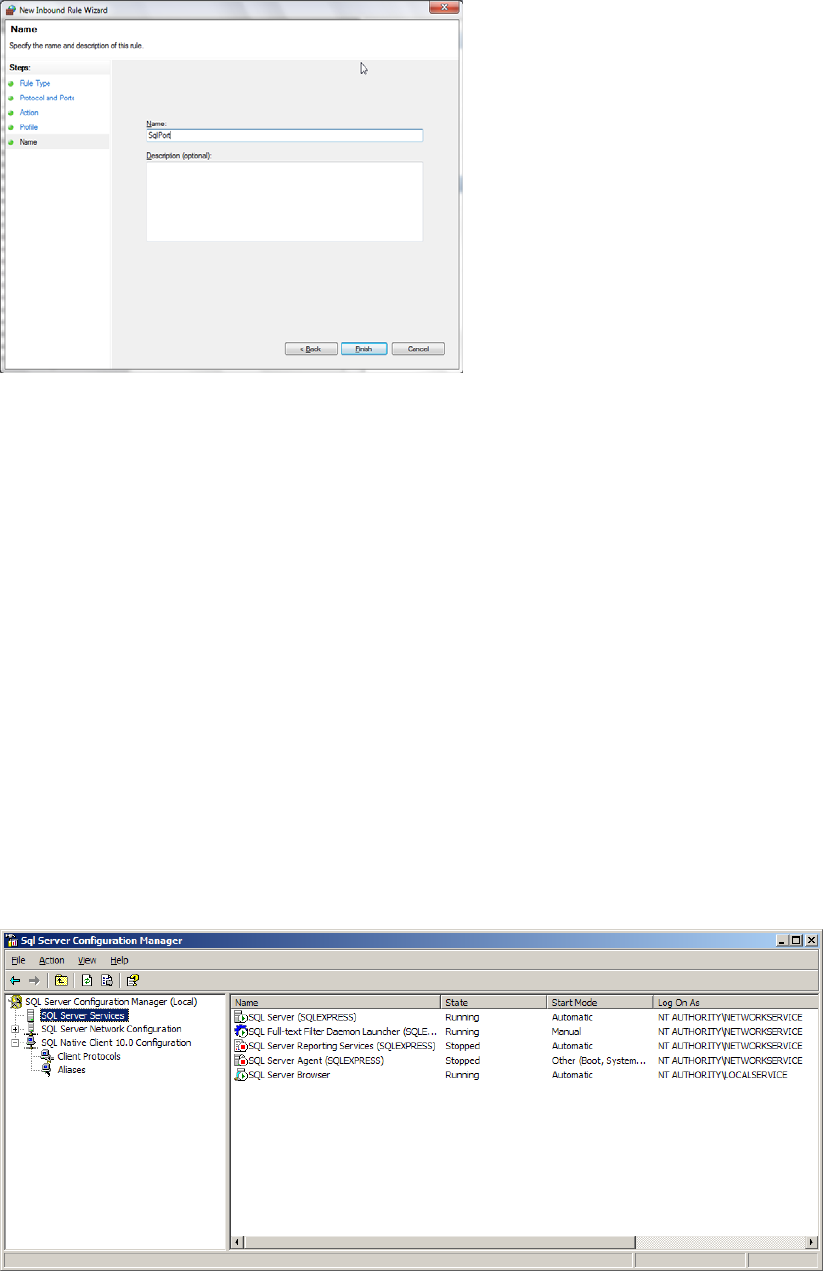
Configure Sql Server Manager Settings
Log in as Administrator
Open Sql Server Configuration Manager (Start-Programs-Microsoft Sql Server 2008 R2-
Configuration Tools-Sql Server Configuration Manager)
Sql Server Network Configuration
o Protocols for SQLEXPRESS
Named Pipes – Enable
TCP/IP – Enable
- Sql Server Services
o SQL Server (SQLEXPRESS) set to Automatic– Restart to apply the above
o SQL Server Browser set to Automatic and start it.
Make sure both the Sql Server (SqlExpress) and Sql Server Browser are set to Automatic Start
mode and running.
You will most likely need to either restart SQL Server (SQLEXPRESS) above (rt-click) or
Restart the entire computer for the client protocols to be effective immediately.
Verify a Remote connect to the instance through Sql Server Management Studio can be made.
Creating a Publication in Sql Server 2008 R2
Using the Wizard
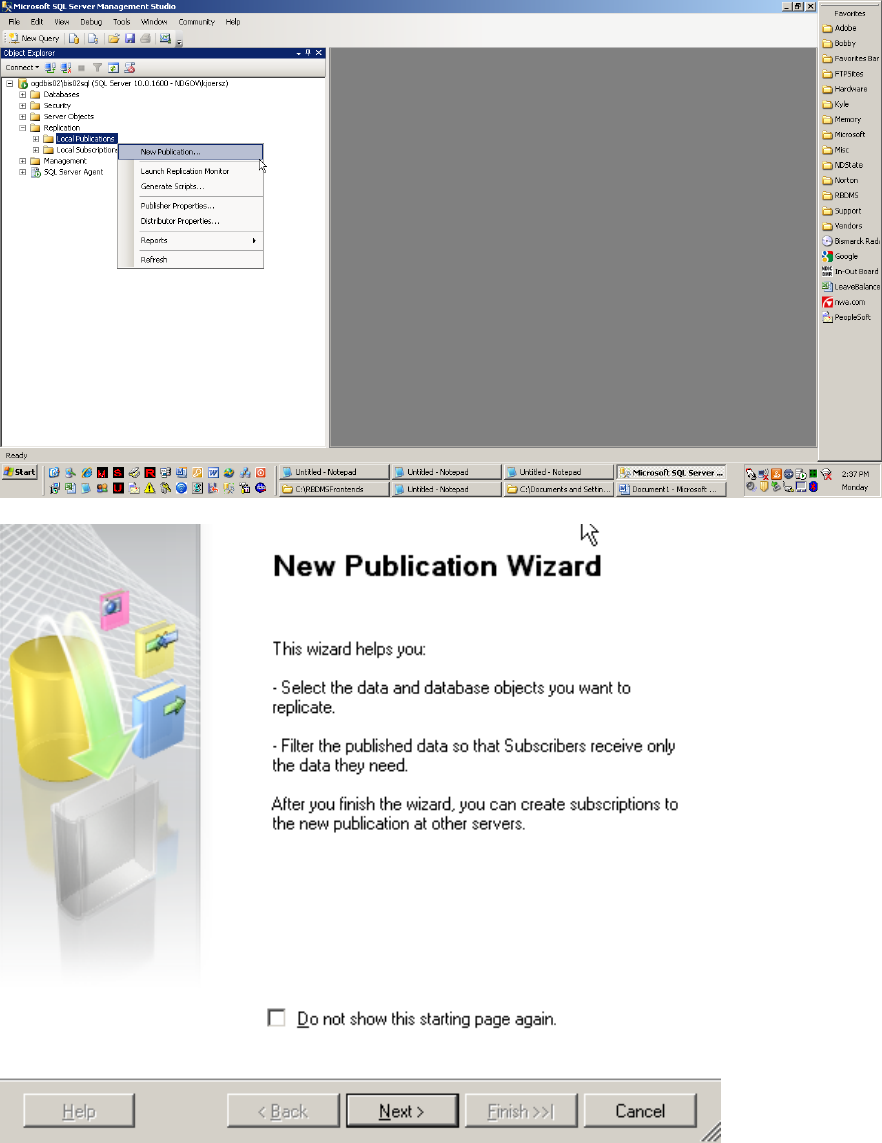
Connecting to the Server instance, rt-Click-Local Publications-New Publication
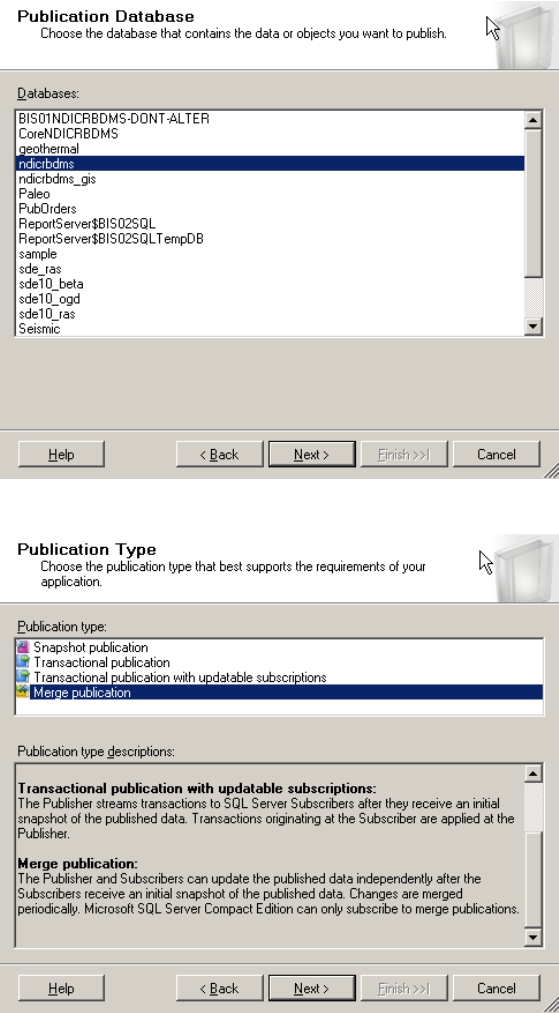
Select the database
Select a publication type
Select Subscriber Type
If you are publishing to an older Sql Server such as 2000, you will only able to create the
same type of publication that was created using the older version. In other words for us,
only Merge publications. When we upgrade our web server to Sql Server 2008, we will
switch the publications to strictly 2008. See Next screen shot!
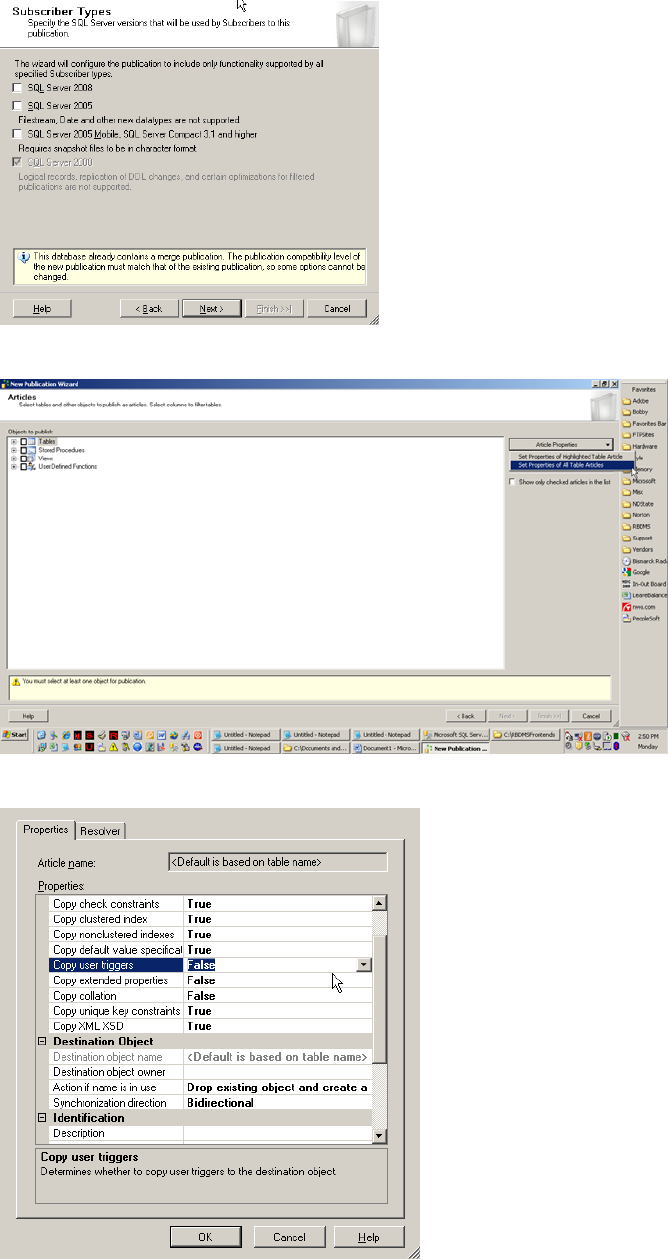
Set Article (Table) properties and for all table articles to start with.
We didn’t want the User Triggers replicated so we set all table properties to this.
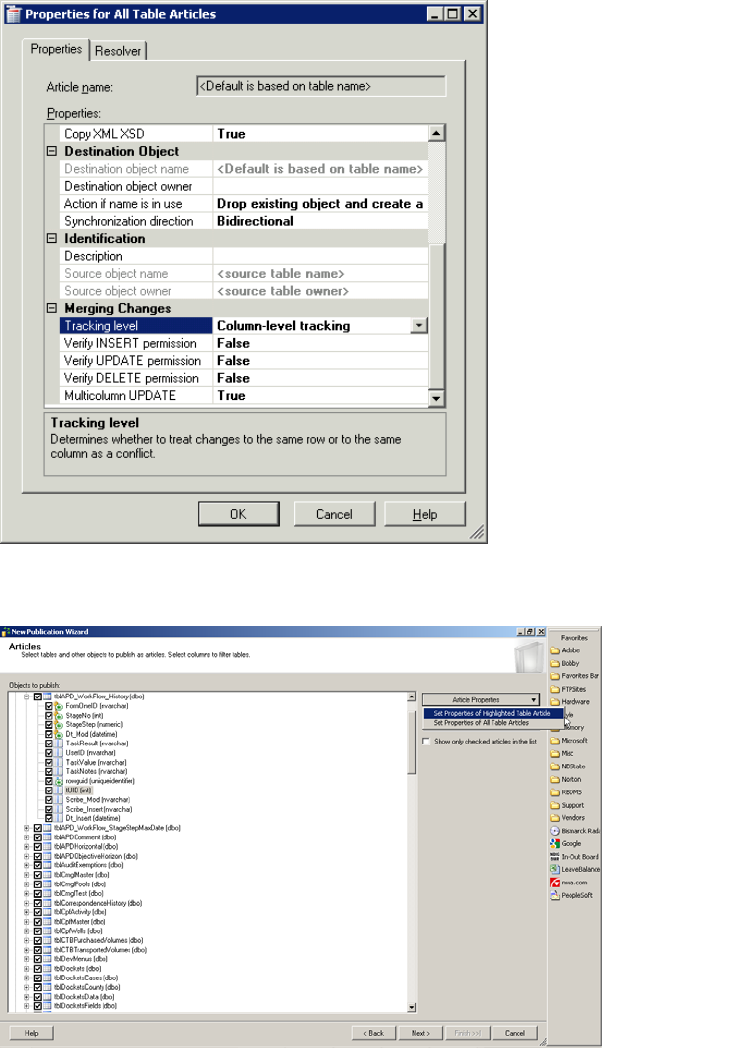
To cut down the number of conflicts that could be encountered, it may be desirable to
change the “Tracking level” setting for all tables from the default of “Row-level
tracking” to “Column-level tracking”. Row-level implies that if changes from two
different users (one being a subscriber) change two different columns in the same row, a
conflict will be generated. By changing this setting to Column-level, conflicts will only
be generated if it on the exact same column for the record. (Thanks to Chuck (Nebraska)
and Rick (Mississippi) for this information.
Now for individual table properties:
Select a table and select Set Properties of Highlighted Table Article
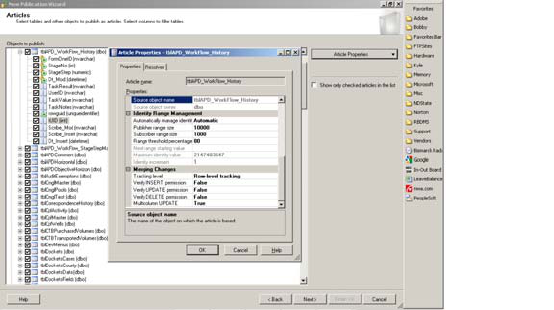
For ALL tables containing an Identity column…. You should define the Publisher /
Subscriber ranges. In some tables the default will work, but they should be reviewed.
Adjust the Publisher and Subscriber Range sizes for all table columns that are
IDENTITY. There can be only 1 Identity column per table.
Range Sizes
- Publisher Range Size
Make this large enough to handle current record count PLUS room for enough future
growth until the next time you break replication. For example there are approximately
94,000 rows in tblAPD_WorkFlow_History. I would set the Publisher range size to
2,000,000. The top limit is around 1 billion for identity columns of integer types so this
shouldn’t present a problem at all for this table. The default is 10,000. Every table must
be evaluated separately and precisely.
- Subscriber Range Size
Make this one large enough to handle what a subscriber needs for inserting records
BETWEEN synchronizations. For this particular table no subscribers insert into this
table, so I would leave it at the default of 1000.
We didn’t realize the Publisher Range Size worked this way… thinking that Publisher
simply had a larger range given out during synchronization… so we didn’t make the
range large enough for a handful of tables and thus we have gone over the Publisher
Range Size with the current record count. What has happened seems to be the Publisher
(server) now acts as a Subscriber as to the Range Size (1,000), and it doesn’t update by
itself when it gets above the threshold percentage, since it doesn’t ever synchronize.
Upon extensive research, and trial and error, 2 ways for the publisher to get its ranges
reset once it reaches it top side. Either a Merge agent runs, or the user that is inserting
the record is a dbo. Since the ranges are reviewed for each subscriber when they
synchronize (via the merge agent running), they are all take care of. Since the merge
agent doesn’t run on the publisher side, this doesn’t get reviewed automatically. So when
someone connected directly to the server for this particular table
(tblAPD_WorkFlow_History), when the 1,000 ranges maximum value is reached, the
user will get the following error:
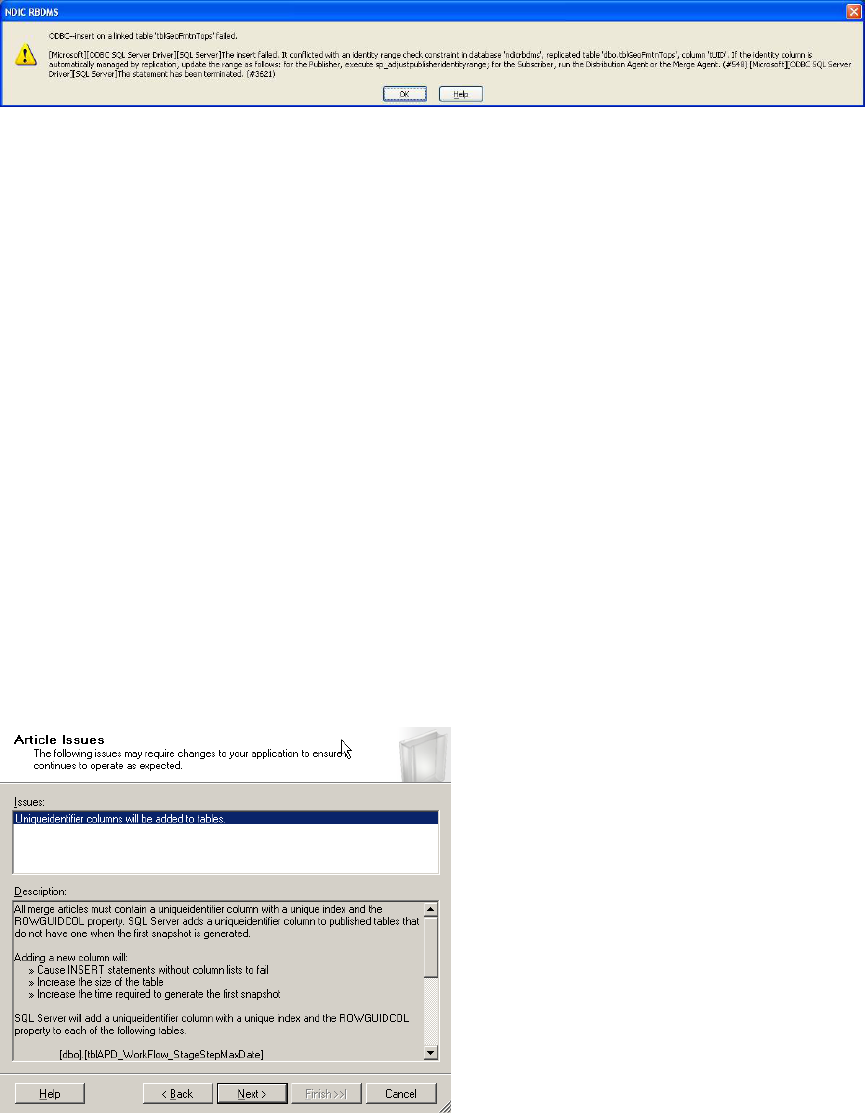
To “open up” the problem table, the user inserting on the server must either be a dbo, in
which case the range will be updated or the following procedure must be run (Master
table system stored procedure):
sp_adjustpublisheridentityrange
This will assign a new range to any table that is locked up. We have this scheduled to run
every hour, but occasionally have to run it upon request. We also have determined that
the threshold setting (default = 80%) doesn’t seem to apply to the Publisher, so
scheduling it doesn’t seem to eliminate the error occuring.
Other examples:
tblLeaseProdWell current record count = approx. 1,900,000. I would make the Publisher
Range = 100,000,000 and the since no subscribers add records to this table… Subscriber
Range = 1,000 should do.
tblFieldInsp current record count = approx. 350,000. This table is updated and inserted
into primarily by the subscribers, but they are extremely good about synching regularly
and would never enter more than 1000 between synches, but I would set the Subscriber
Range at 2,000 or 5,000 just in case and the Publisher Range at 10,000,000.
Click Next
Click Next
Take out the “Create Snapshot immediately” if you want to control the location of the
Snapshots. By default it is checked. You can modify the location path and then run the
snapshot at that time. We will visit this shortly.
You can modify the snapshot schedule now or wait until later.
Click Next
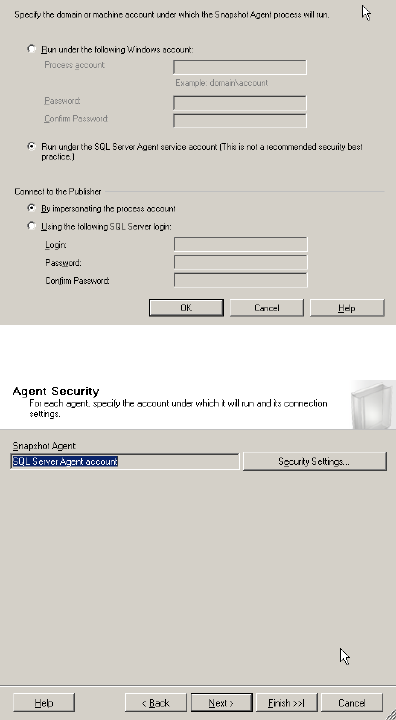
The default for the snapshot agent is to run under the following windows account. We
have this running as shown below, but you could enter in an account to run as.
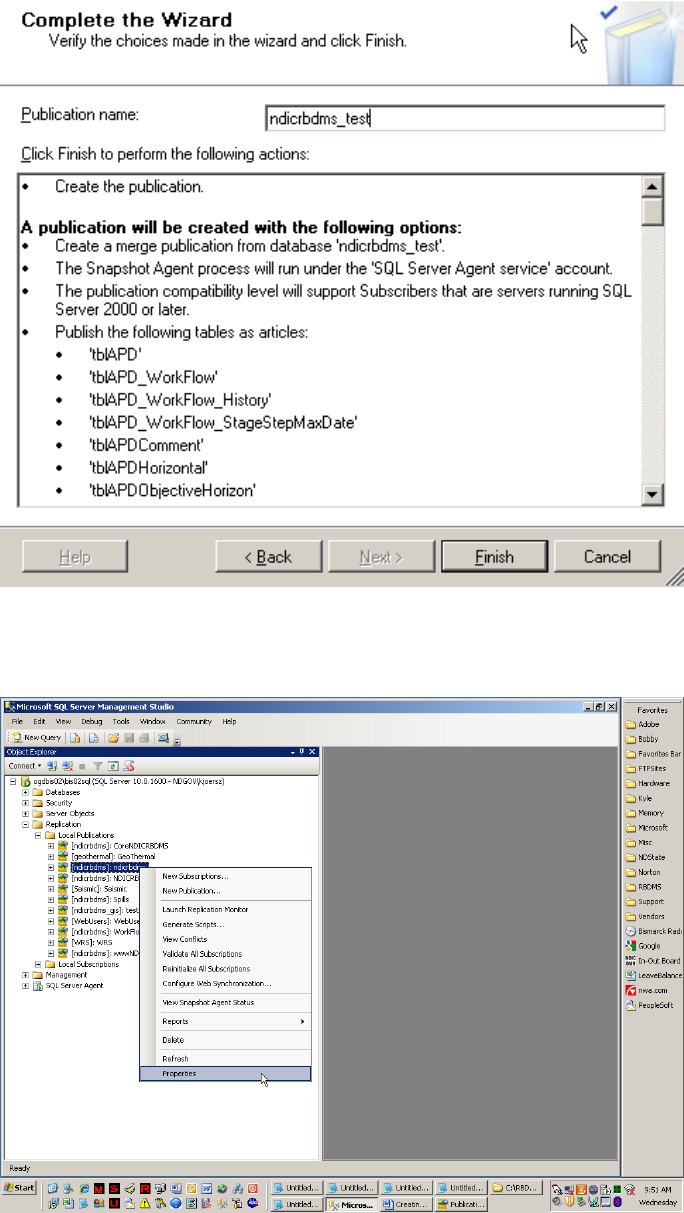
Click Next and Finish to create the Publication.
We left this one for now.
Click next and Enter a Name for the publication and click Finish.
Now review and adjust the location of the Snapshot.
Rt-Click – Properties on the Publication
Click on Snapshot and if you want a different location than default – RECOMMENDED,
click on “Put files in the following folder:” and put the desired path in.
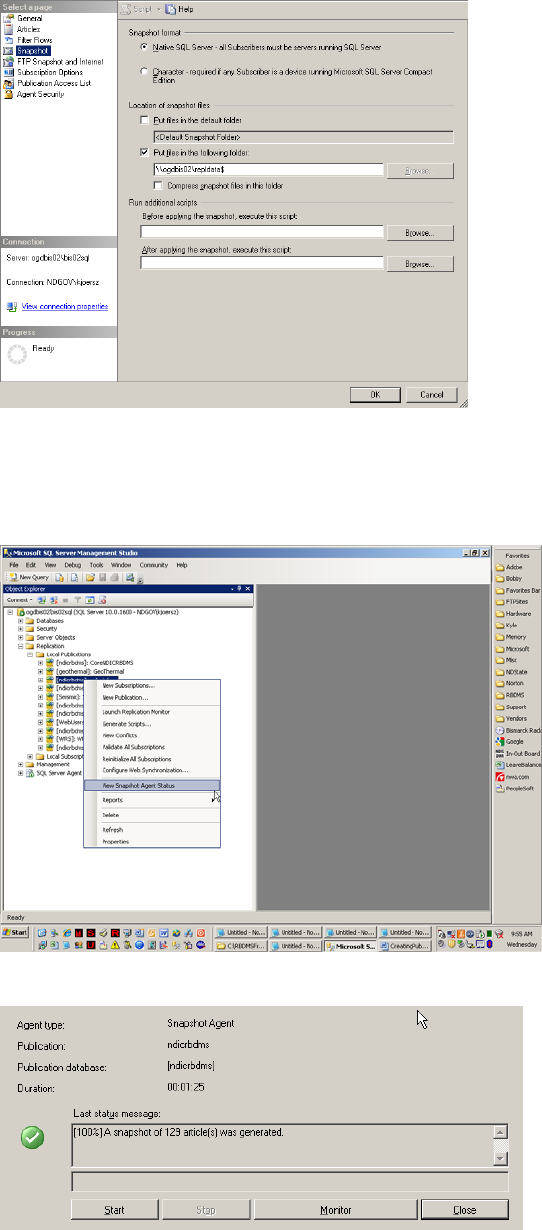
Although there are other things to be done in Properties, we will close this and run the
snapshot and come back later to this.
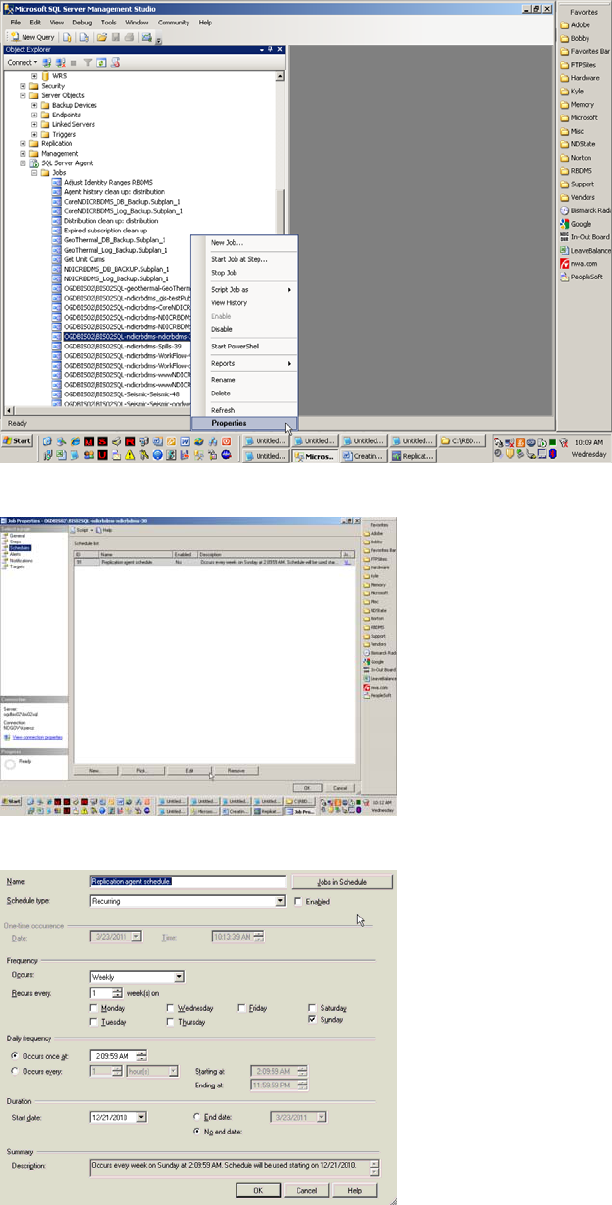
Rt-Click – Properties on the Publication.
Click Start to generate the snapshot. Close all Publication Properties windows.
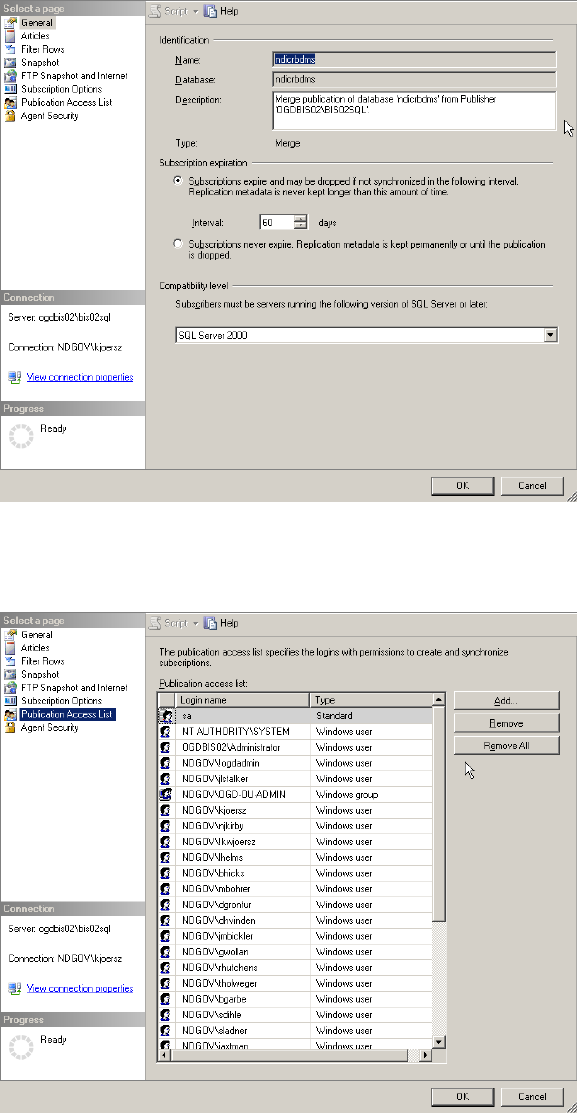
To adjust the snapshot schedule, Open Database name in Management Studio - rt-Click-
properties on the job in Sql Server Agent - Jobs
Click on Schedules – and then on Edit. Other settings are available in this including
notifications, etc. Play as you have time.
Adjust as desired.
Close the job and all forms relating to it.
Return to Publication Properties (Rt-Click-Properties on the Publication).
General – Make sure you adjust the Subscriptions expire…… Interval. The default is
14 days. This means if a subscription hasn’t synched in 14 days, it will expire and will
have to be recreated. We change all of our subscriptions to 60 to cover any chance of
lengthy absences or illnesses.
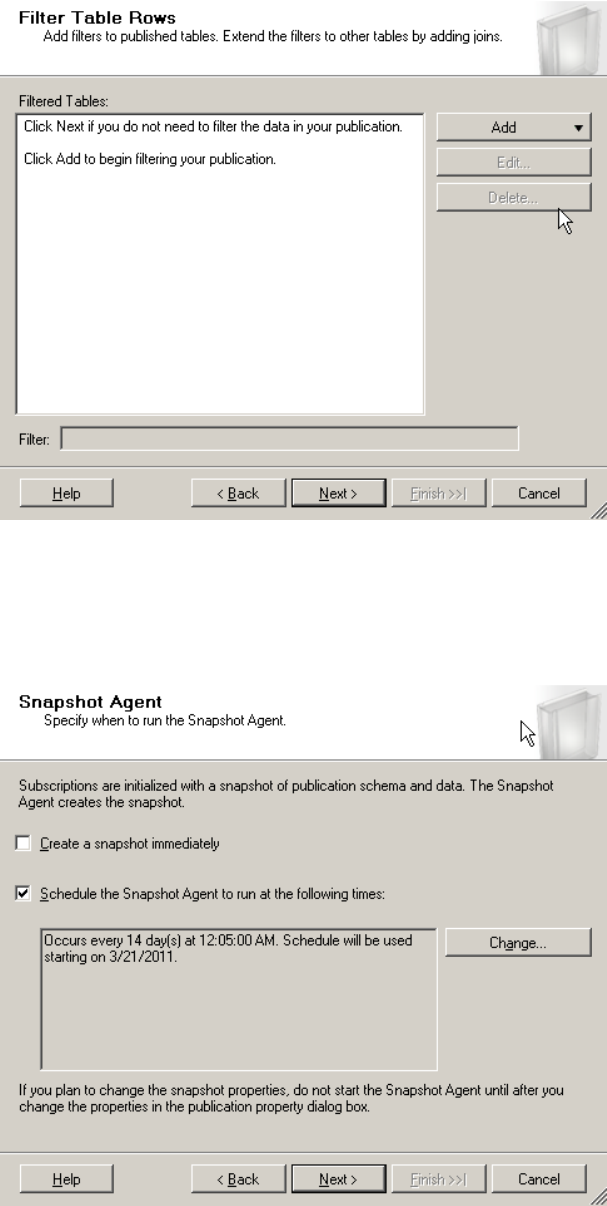
Articles can be adjusted here in case you included something you didn’t necessarily
need. Filters can be created here if necessary. We previously visited Snapshot.
Click on Publication Access List (very important)
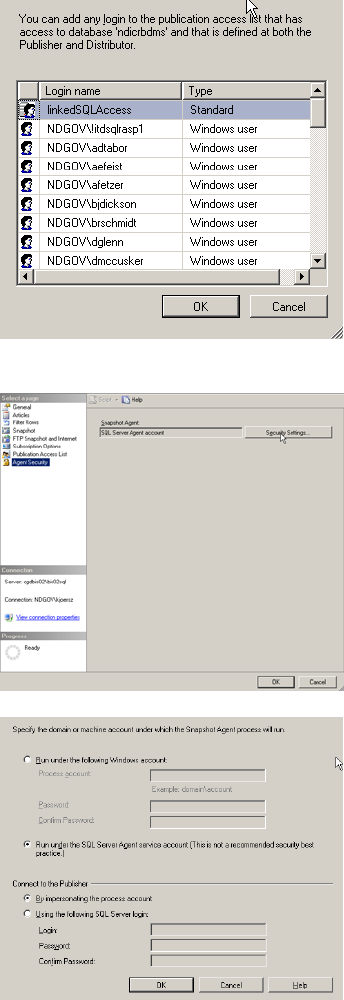
If you use Windows synchronization for subscriptions, each of the user (or roles
including the user) must be included here. Click Add. All users must also have access to
the database the publication is for, so they need to be in Database-Security-Users.
Click on Agent Security – Security Settings.
Adjust if desired.
Close Publication Properties and all affiliated windows.
Creating Subscriptions in Sql Server 2008 R2
Using the Wizard
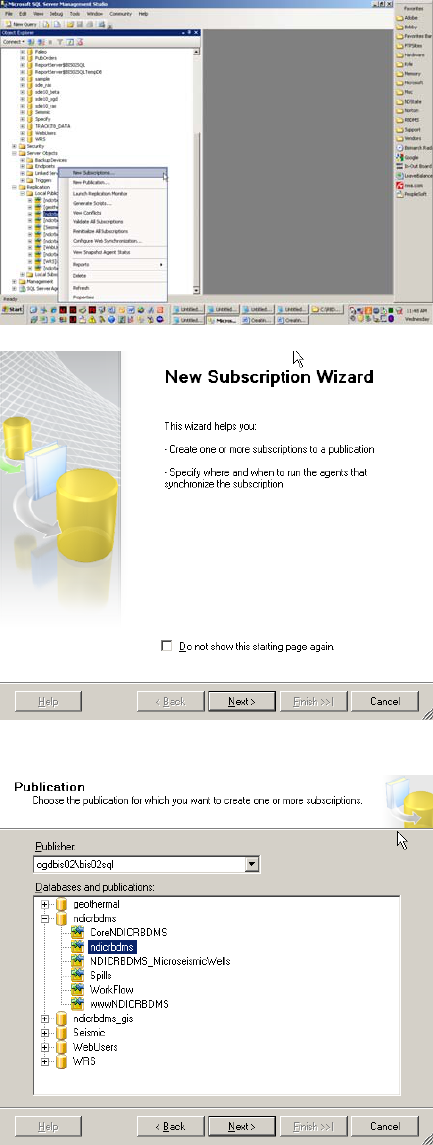
Rt-Click on the Publication – New Subscription
Click Next
Select the publication, and Click Next
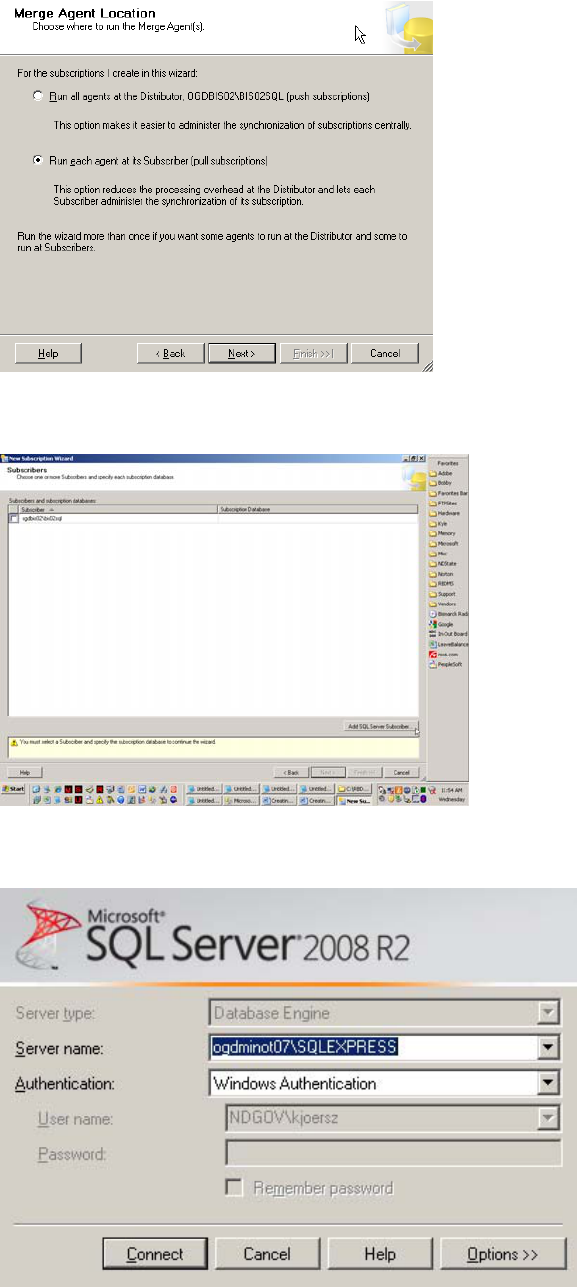
We like to run pull subscriptions so select “Run each agent at the Subscriber”, Click Next
Click “Add Sql Server Subscriber” and Connect to that instance.

Select the database (Select New database if doesn’t exist yet). Click Next
Click on the build button (….). You can change the Windows account the Merge Agent
runs under or leave the default (below). Click OK
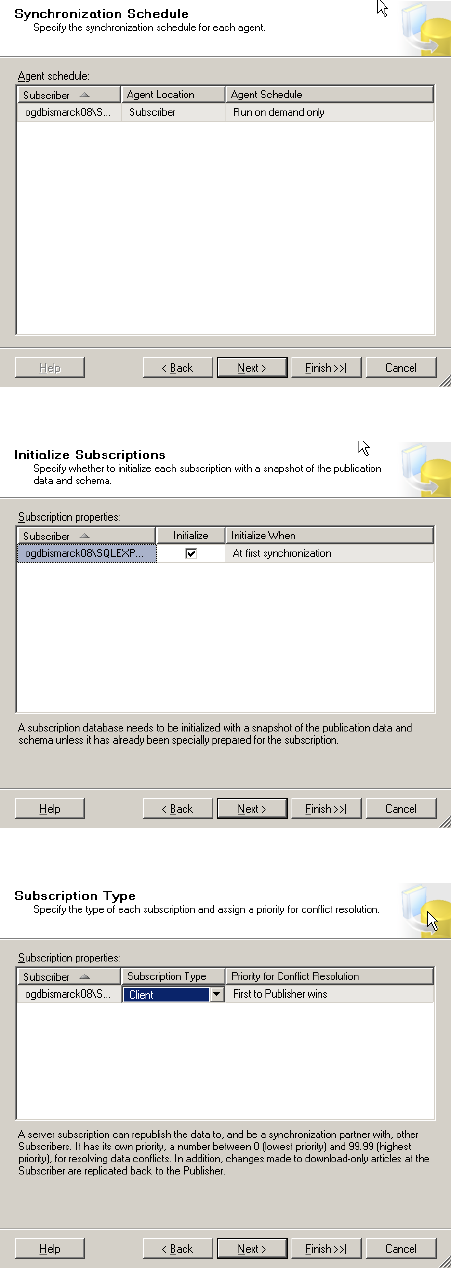
Click Next
Click Next
Click Next
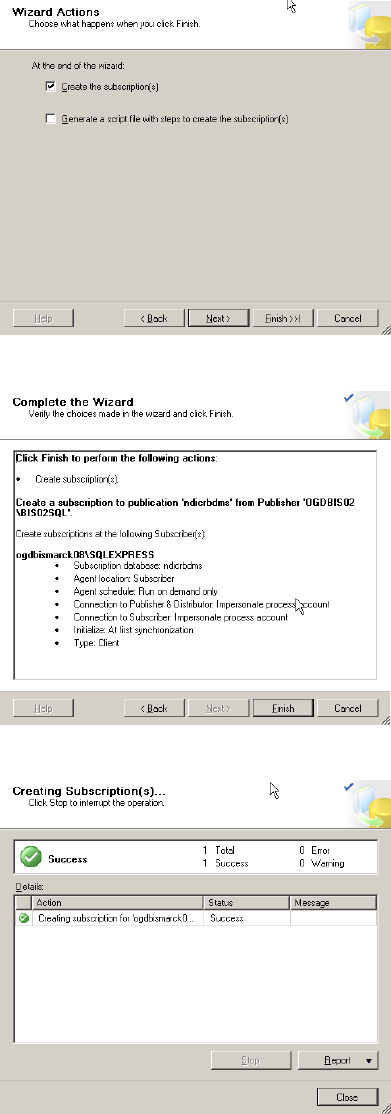
Click Next
Click Finish to create the Subscription
Close
Initialize the Subscription by logging onto the Subscriber as a Sql Server Administrator
or a database dbo. We did this through Remote Desktop Connection for our Field office
personnel. The logon must also be in the Publication Properties – Publication Access
List. Since there is no merge agent in Sql Server Express, Windows Synchronization is
the vehicle to initialize and synchronize the subscription.
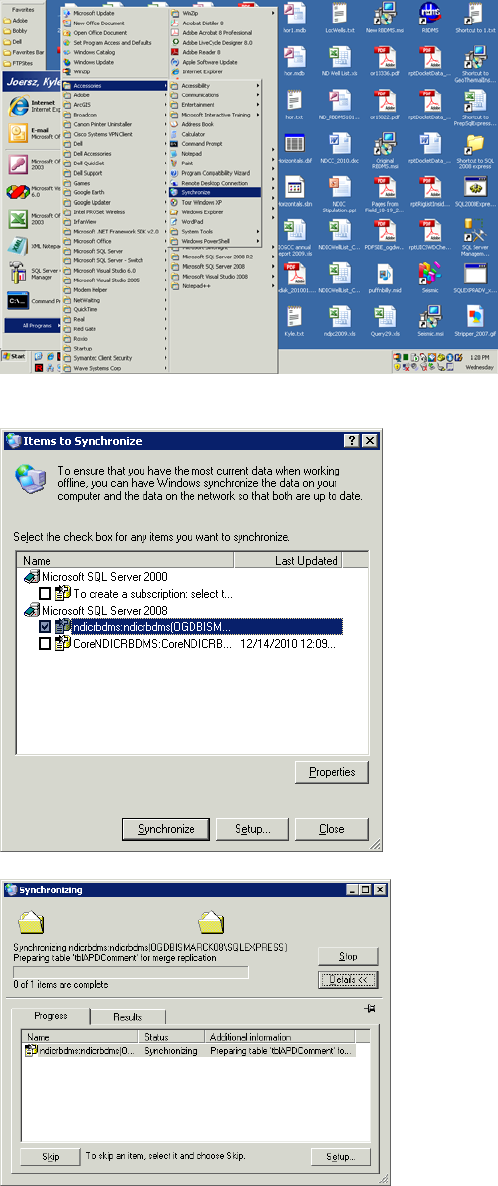
Windows XP Synchronization
Start Windows Synchronization (Program Files – Accessories – Synchronize).
Recommend desktop shortcut to Synchronize and put it in the All Users – Desktop.
Select the Subscription and click Synchronize.
This could take a while, depending on the amount of data, especially if over the network.

Windows 7 Synchronization
Start Windows Synchronization (Start-All Programs-Accessories-Sync Center)
Rt-Click-Open Microsoft SQL Server 2008 to view subscriptions
Rt-Click on Subscription to Start Synchronization
Database Permissions / Synchronization Properties
Permissions for the user must be copied or entered into the sql server instance in order for
the user to be able to synchronize using their login account. The permissions can be
scripted from the server or entered manually.
Add a sql synchronization account into the system. This must be entered in both
instances’ databases (Server and Subscriber). The account MUST be a dbo on both
instances. I have never been sold on giving a user any account with dbo permissions, but
I haven’t found any other way to synchronize seamlessly.
The user will be required to enter the password twice every time they synchronize so
make it simple.
Open Windows Synchronization, Select the Subscription, and click on Properties (or
double click on it).
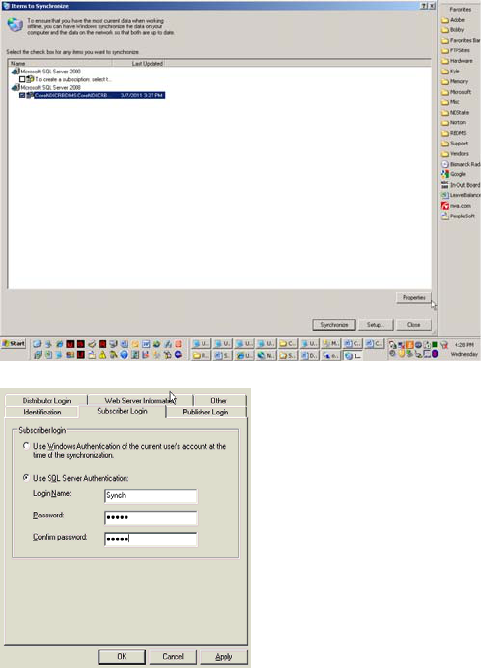
Windows XP
Select the Subscriber Login tab
Change to “Use SQL Server Authentication” and enter in the account and passwords.
Click Apply and OK. From then on, the user will be prompted with this screen. Only the
Login Name will be filled out. After they enter the passwords, the synchronization
should run.
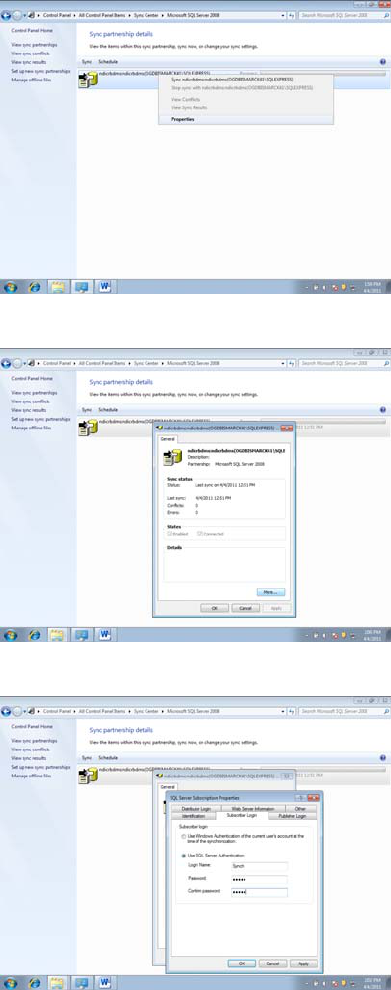
Windows 7
Rt-Click-Properties on the subscription
Click on More…
Click on Subscriber Login and input the Administrative credentials.
We are currently working on a VB application that will emulate the Windows
Synchronization, use the currently logged on Windows account, but synchronize as (run
as) an Administrative Sql Server account in the module. This way the end user will not
have to enter the passwords. Also, something lost in Sql Server 2008 that was in 2000
was the Merge Agent. In 2000, the MA allowed for synchronization to be scheduled at
the user’s discretion. There is not MA in “Express”. We also are working on
programming this VB app with a scheduling capability.
